Learn how to install a DIY kitchen backsplash using peel-and-stick tiles. Perfect for beginners and budget renovations. Step-by-step guide included.
Let’s be honest—most kitchens have that one wall that just looks…meh. If you’ve been staring at a plain space behind your sink or stove, wondering how to make it pop without spending a fortune, you’re in the right place. 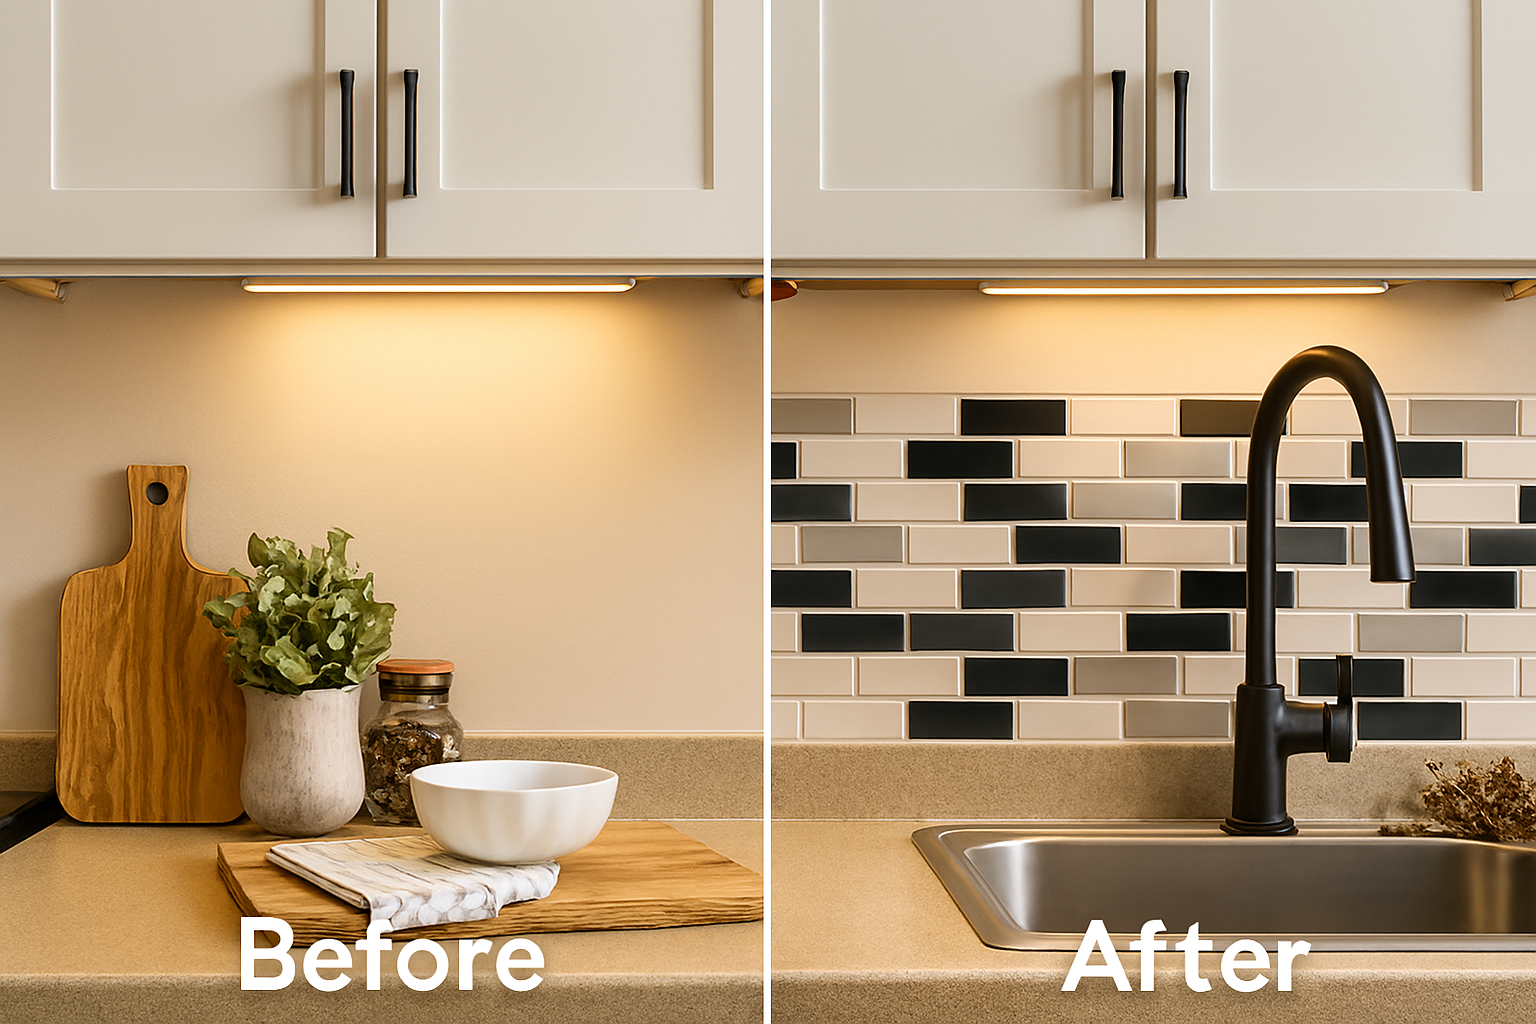
Installing a DIY backsplash is one of those projects that sounds harder than it is. With peel-and-stick tiles, a few basic tools, and a free afternoon, you can completely change the vibe of your kitchen And if you’re planning a bigger makeover, check out the Ultimate Guide to DIY Kitchen Remodeling—it’s packed with ideas that won’t break the bank.
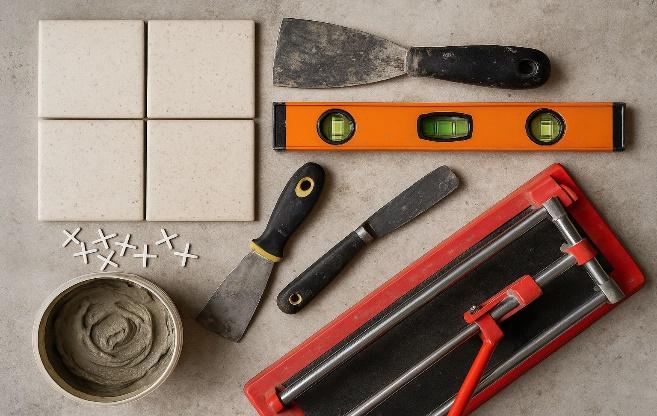
What You’ll Need
No fancy gear required. Just grab these basics:
Tools:
Tape measure
Utility knife
Level
Pencil
Cloth or sponge
Ruler
Gloves (trust me, they help)
Materials:
Peel-and-stick tiles
Optional adhesive
Grout (depends on tile type)
Wall cleaner or primer
Caulk for edges
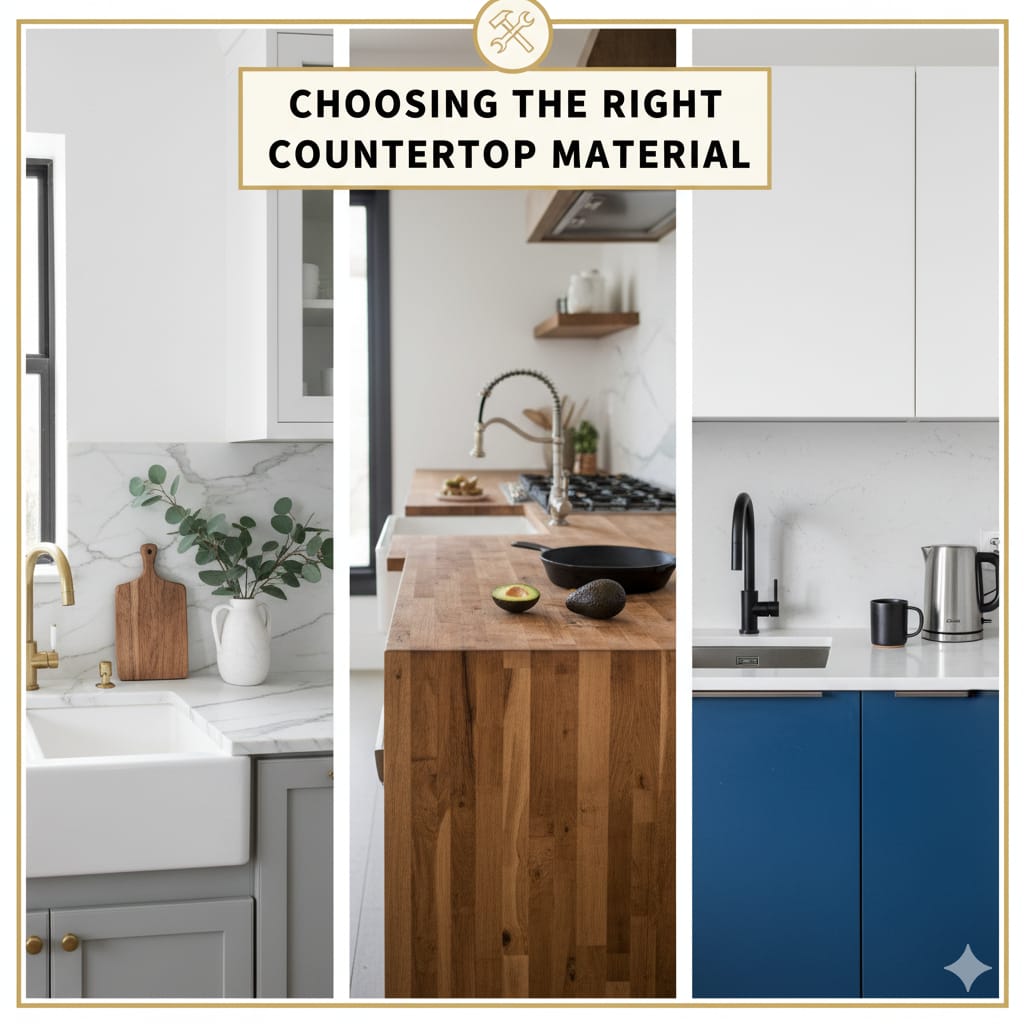
Tip: Choose tiles that are moisture-resistant and easy to clean. Vinyl and metal options are great for beginners. If you’re still exploring tile types, this guide to choosing backsplash materials breaks down the pros and cons of each option.
Step-by-Step Installation Guide 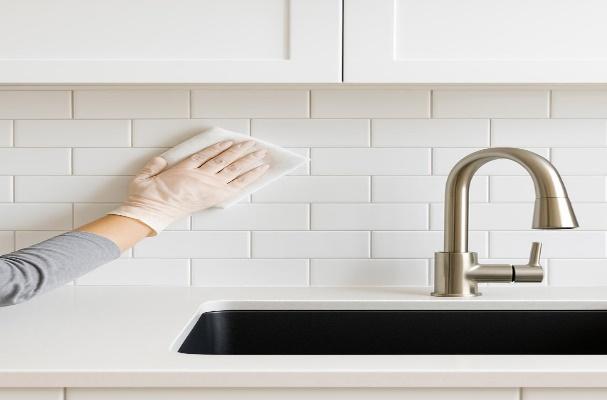
Step 1: Prepare the Wall
Start by giving the wall a good clean. You don’t want any grease, dust, or old paint messing with the tiles later. A bit of dish soap and warm water usually does the trick. Once it’s dry, grab a microfiber cloth and go over it one last time—this helps avoid lint and gives you a smooth surface to work with.
If you’re not sure how clean is “clean enough,”
before installing anything.
Step 2: Plan Your Layout
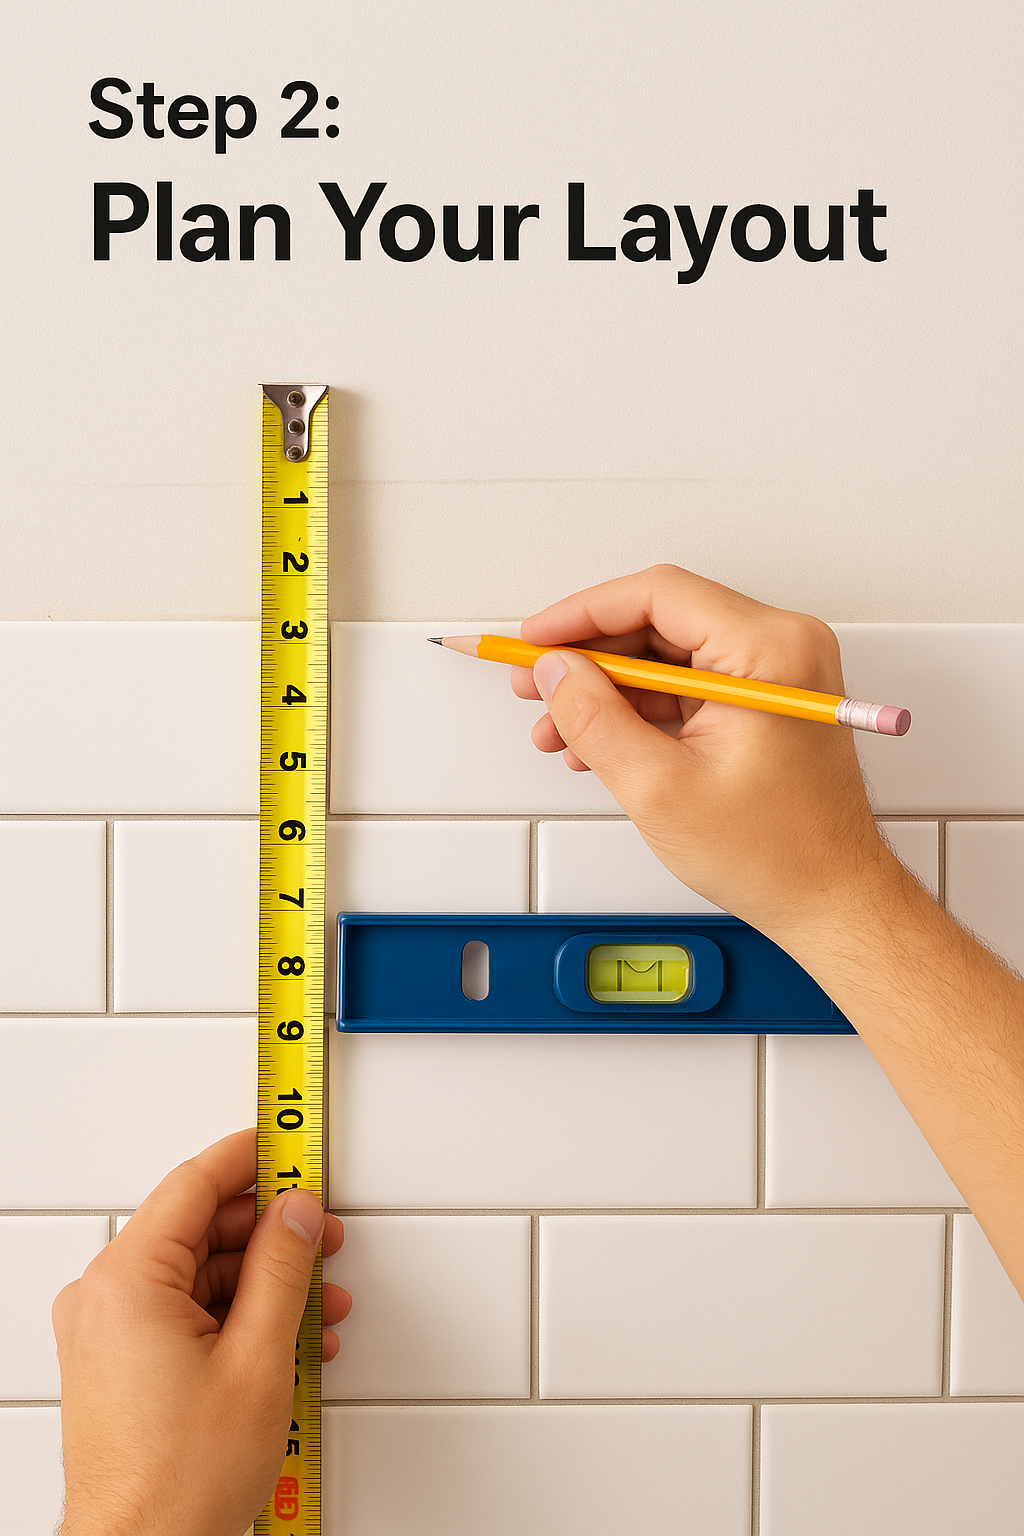
Measure the backsplash area carefully. Use a pencil and level to mark guidelines.
Dry-fit the tiles on the counter to visualize the layout before sticking them.
Avoid starting without a center point—it can lead to uneven results. If you’re working around outlets or corners, it will help you get it right.
Step 3: Cut the Tiles
This part takes a bit of patience, but it’s totally doable. Start by laying your tile sheets flat on a clean surface. When you get to corners, outlets, or edges, grab a sharp utility knife or a basic tile cutter and take your time with each cut. Don’t rush—clean cuts make a big difference in how polished the final look feels. 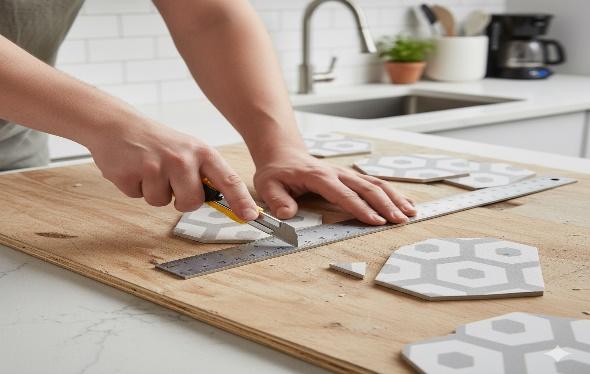
If you’re working with glass or stone tiles, you’ll need something a bit stronger, like a wet saw or a glass cutter. It sounds intimidating, but once you get the hang of it, it’s pretty straightforward.
Quick heads-up: wear gloves and goggles. Tile edges can be sharp, and you don’t want dust or tiny shards flying near your eyes. If you’re using any specialty tools, Creating a Feature Wall with Paint or Wallpaper walks you through how to handle them without stress.
Step 4: Apply the Tiles
Peel off the backing and press the tile firmly onto the wall. Start from the bottom center and work outward. Use a level to keep lines straight. 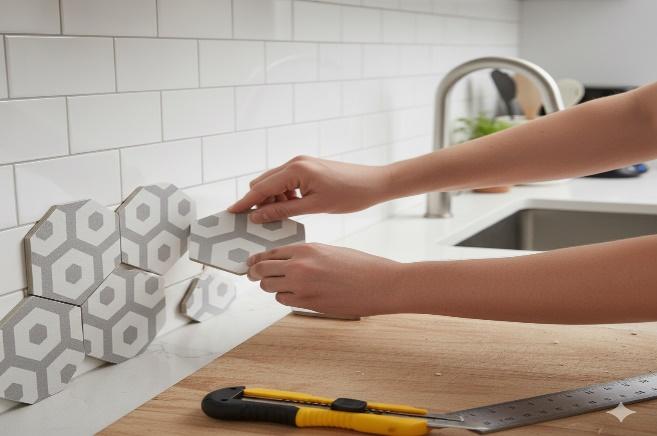
Tip: Press each tile for 10–15 seconds to ensure strong adhesion. Want to highlight your new backsplash? for a warm, professional finish.
Step 5: Seal and Finish
You’re almost done! If your tiles require grout, go ahead and fill the gaps between them. Take your time and use a damp sponge to gently wipe away any excess before it dries. Around the edges and near outlets, a thin line of caulk will help tidy things up and give it a clean finish. 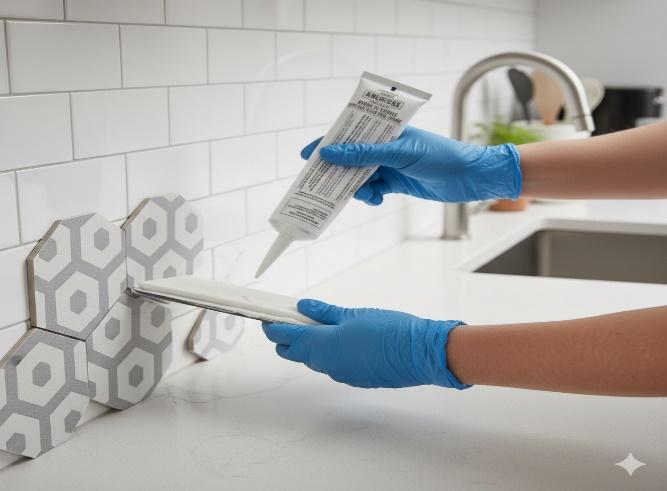
I let everything sit for a full 24 hours before using the kitchen again—just to be safe and make sure everything had set properly.
If your backsplash turned out great and you’re feeling inspired, fix squeaky doors and floors without replacing them completely.
Common Mistakes to Avoid
Even with a simple project, a few missteps can throw things off. Here are some things to watch out for:
- Not cleaning the wall properly before starting
- Cutting tiles without double-checking your measurements
- Applying tiles to damp or uneven surfaces
- Using the wrong adhesive for your tile type
- Forgetting to turn off power when working near outlets
Pro Tips for a More Polished Finish
Want your backsplash to look like it was done by a pro? Try these little tricks:
- Use kraft paper to trace tricky shapes before cutting
- Paint the wall behind your tiles a similar color—it helps hide tiny gaps
- Mix tile styles or patterns to give it a custom feel
- Add under-cabinet lighting to make the backsplash stand out
FAQs
Do I need to remove cabinets? Nope. Most peel-and-stick tiles fit around them easily.
What’s the easiest tile for beginners? Vinyl peel-and-stick. No contest.
How long does it take? 2–4 hours, depending on your space and pace.
Is it durable? Yes, especially if you seal it well.
What grout should I use? Unsanded for narrow joints, epoxy for moisture-prone areas.
What’s the best grout for kitchen walls? Use unsanded grout for narrow joints and epoxy grout for water resistance.
.