
Got a hole or crack in your wall? Learn how to patch drywall properly with simple tools and no stress. This guide walks you through every step—no experience needed.
That Hole in the Wall? You Can Handle It
Drywall damage is part of life. A doorknob swings too far. A chair scrapes the corner. Maybe someone got a little too confident hanging shelves. Whatever the cause, now there’s a hole — and it’s not going to fix itself.
The good news? You don’t need to call a pro. You don’t even need to be “handy.” With a few basic tools and a little patience, you can patch drywall like you’ve done it a dozen times.
And if this is your first time tackling home repairs, check out Essential DIY Fixes Every Homeowner Should Know—it’s a solid place to start.
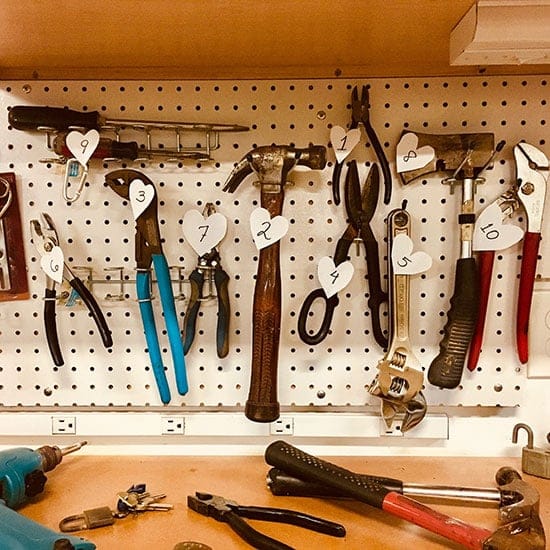
Step 1: Gather What You’ll Need
No need for a full toolbox—just the essentials:
- Utility knife
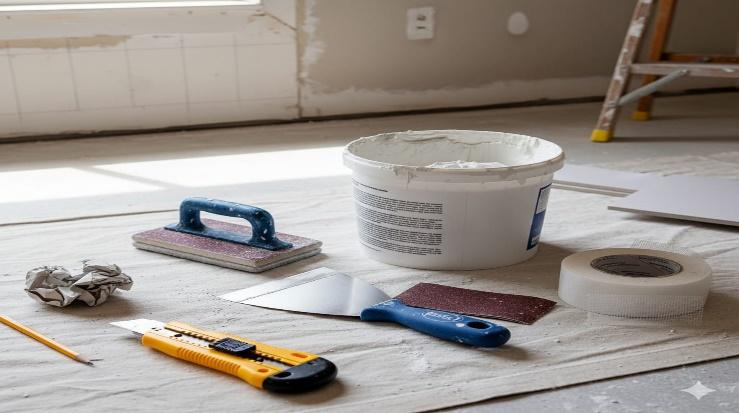
- Putty knife
- Sanding block or sponge
- Drywall patch or mesh tape
- Joint compound (aka drywall mud)
- Primer and paint
- Damp cloth
- Small tray or plate for mixing
Not sure which patch to use? DIY Accent Lighting Ideas breaks it down by hole size and wall type.
Step 2: Clean and Prep the Area
Start by wiping the area with a damp cloth to remove dust and loose debris. If the edges of the hole are jagged or flaking, trim them with your utility knife.
You want a clean, solid surface for the patch to stick to. 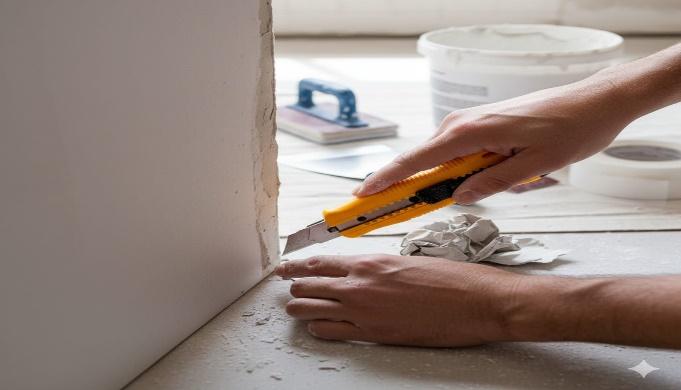
For holes bigger than a coin, cut a square or rectangle around the damage. It might feel weird to make the hole bigger—but trust the process. Clean edges = cleaner finish.
Step 3: Apply the Patch or Tape
- Tiny holes (nail/screw size): mesh tape is enough.
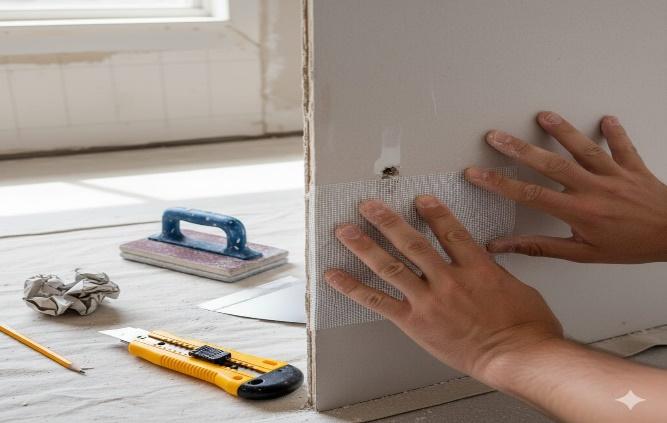 Small to medium holes: use a self-adhesive drywall patch.
- Larger holes: you’ll need a backing piece—check. How to Fix Bathroom Leaks Without a Plumber
Stick the patch over the hole and press it flat. Make sure the edges are flush with the wall—no bubbles, no folds.
Step 4: Mud It Smooth
Scoop a bit of joint compound onto your putty knife and spread it over the patch. Start in the center and feather out toward the edges. Keep it thin—you’re blending, not building.
Let it dry completely (check the label—usually 12–24 hours). Then come back for a second coat if needed. The goal is to make the patch disappear into the wall.
Step 5: Sand and Touch Up
Once the mud is dry, sand it gently with a sanding block or sponge. You’re not trying to flatten the wall—just smooth the edges. 
Wipe off the dust with a clean cloth. Then prime the area and paint to match the rest of the wall.
Need help blending the color? How to Build a Raised Garden Bed has quick tips that actually work.
Extra Tips That Make a Big Difference
- Use a damp sponge instead of dry sanding if you want less mess.
- Feather your mud wider than the patch—it hides the repair better.
- Don’t rush the drying time—even if it looks dry, give it a few extra hours.
- Practice on scrap drywall if you’re nervous—it’s worth it.
And if you’re dealing with cracked corners or seams, check How to Fix a Leaky Faucet DIY—it’s a common follow-up repair.
Done—and it looks like nothing ever happened.
Step back and take a look. No hole. No bump. No weird texture. Just smooth, clean drywall—like it was always perfect.
You didn’t just fix a wall. You learned a skill. And next time something hits the wall (literally), you’ll know exactly what to do.