Discover the most essential DIY home fixes—from patching walls to sealing drafts. Save money, prevent damage, and keep your home in top shape with these beginner-friendly repairs.
Why These Fixes Matter More Than You Think
Let’s be honest—owning a home is amazing, but it comes with its fair share of “uh-oh” moments. A dripping faucet at midnight. A mysterious draft sneaking in through the window. A tile that cracks just when guests are coming over.
But here’s the thing: you don’t need to panic, and you definitely don’t need to call a pro every time something goes wrong. With a few basic tools and a little confidence, you can handle more than you think.
This guide walks you through 10 essential DIY fixes every homeowner should know. They’re simple, budget-friendly, and—most importantly—they’ll make you feel like you’ve got this whole “homeowner” thing under control.
And if you’re just getting started, don’t miss our Installing a DIY Fence for Privacy—it’s the perfect companion to this list. 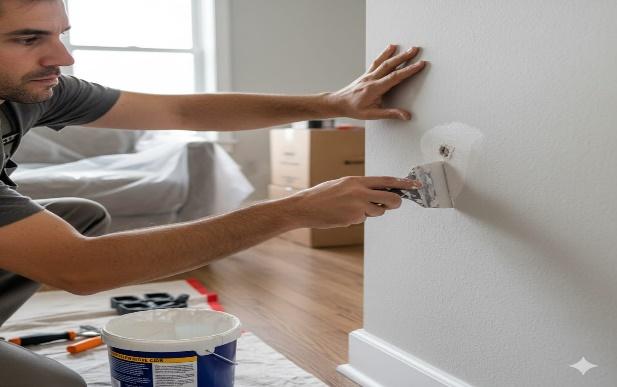
Step 1: Patch Small Wall Holes and Cracks
It starts with a tiny nail hole… then a dent from moving the couch… Then a mystery crack that just appears one day. Walls take a beating—but patching them is easier than you think.
All you need is a tub of spackle, a putty knife, and some sandpaper. Clean the area, fill the hole, let it dry, sand it smooth, and dab on a bit of paint. Fifteen minutes later, it’s like the damage was never there.
And if you’re dealing with something bigger than a nail hole, our Patching Drywall Like a Pro walks you through it step by step.
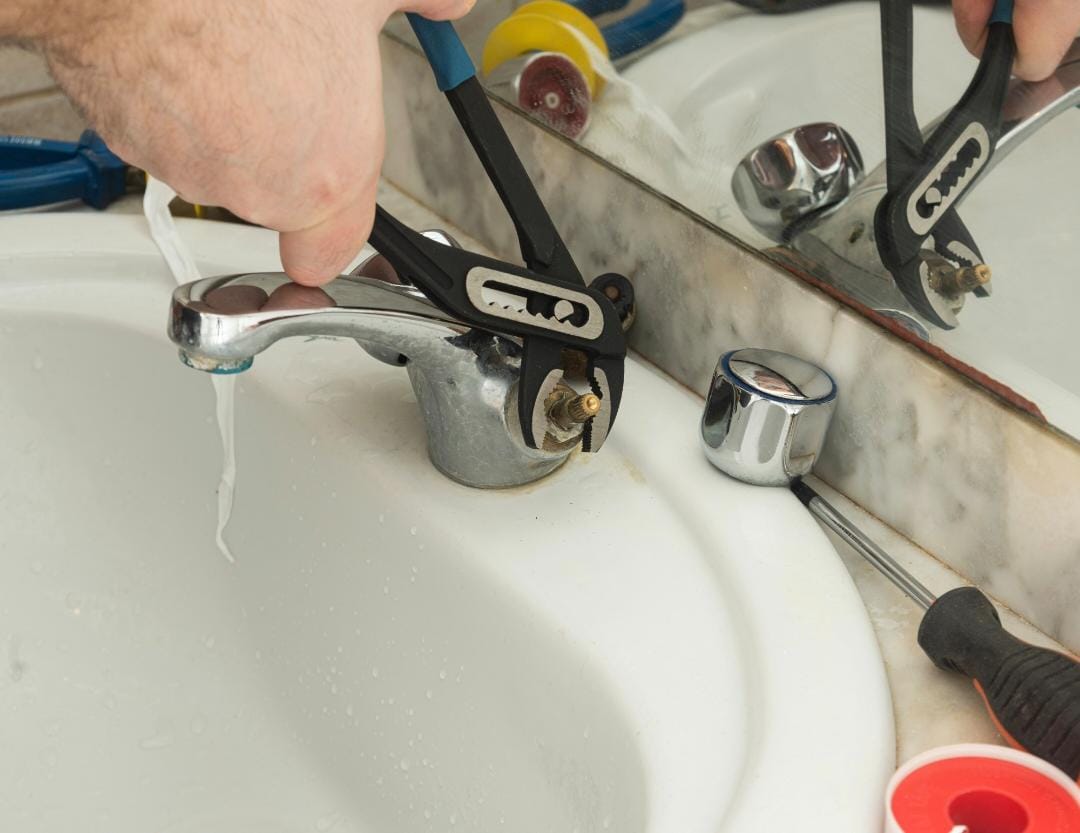
Step 2: Fix a Leaky Faucet
That slow drip-drip-drip isn’t just annoying—it’s literally money going down the drain. Most of the time, it’s just a worn-out washer or O-ring. Nothing fancy. 
Turn off the water, unscrew the faucet, swap the part, and put it back together. You’ll need a wrench and maybe a little patience, but it’s totally doable—even if you’ve never touched plumbing before.
Need a visual? OurHow to Fix a Leaky Faucet DIY breaks it down in plain English.
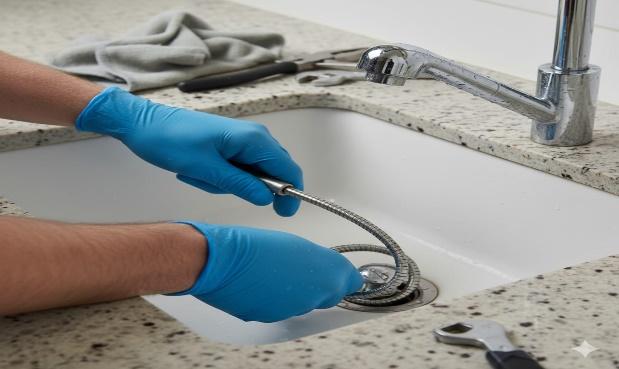
Step 3: Unclog a Slow Drain
You’re brushing your teeth, and the water just… sits there. Gross. But don’t reach for the chemical stuff just yet.
Grab a plunger or a drain snake—hair and soap scum are usually the culprits. A few plunges or a twist of the snake, and you’re back in business.
Want to go the natural route? We’ve got ones that are safe, simple, and actually work.
Step 4: Replace a Broken Tile
One cracked tile can throw off the whole look of your floor or backsplash. But you don’t need to retile the entire area—just swap out the broken one. 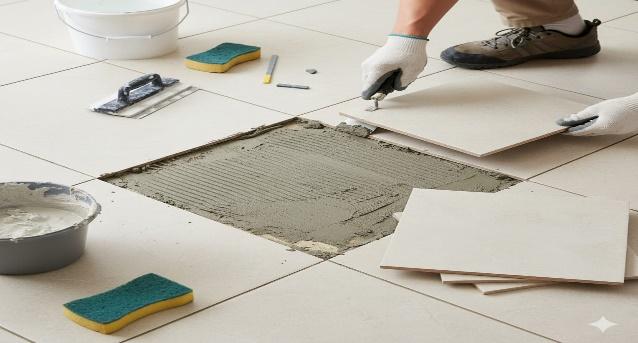
Use a chisel to remove the damaged tile, clean the space underneath, apply adhesive, and press in a new tile. Grout it, wipe off the excess, and let it cure.
Want to match your grout perfectly? Read our Choosing the Best Grout for Wet Areas
Step 5: Seal Drafty Windows and Doors
If your home feels chilly in winter or too warm in summer, drafts might be the reason. They sneak in through tiny gaps around windows and doors—and they mess with your comfort and your energy bill. 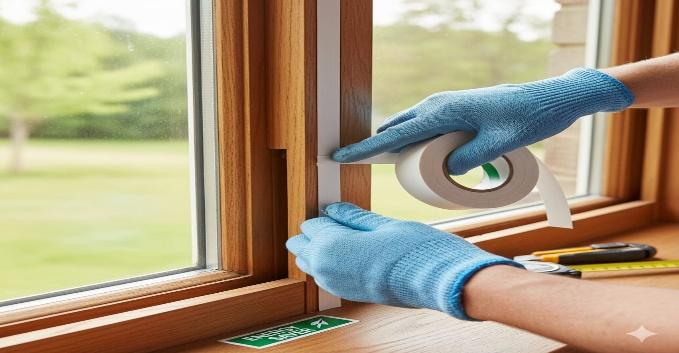
Use weatherstripping or caulk to seal those gaps. It’s a quick fix that makes a big difference.
For a full walkthrough, visit our Power Tools vs Hand Tools: What to Use When
Step 6: Reset a Tripped Circuit Breaker
Suddenly lost power in one room? Don’t panic—it’s probably just a tripped break
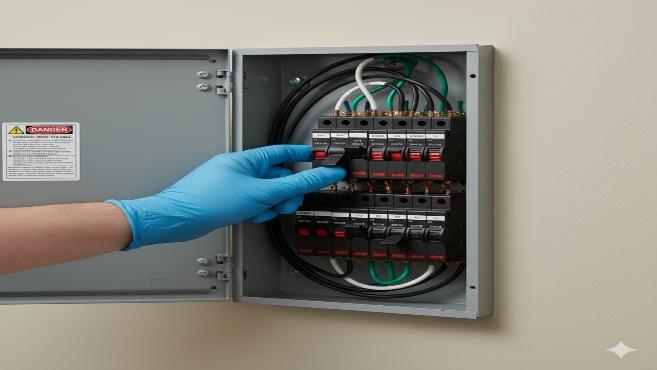
er. Head to your electrical panel and look for a switch that’s stuck in the middle.
Flip it fully off, then back on. If it keeps tripping, unplug a few things and try again
Want to understand your panel better?
Step 7: Clean Gutters and Downspouts
Out of sight, out of mind—until water starts pouring over the edge or seeping into your foundation. Gutters matter more than you think. 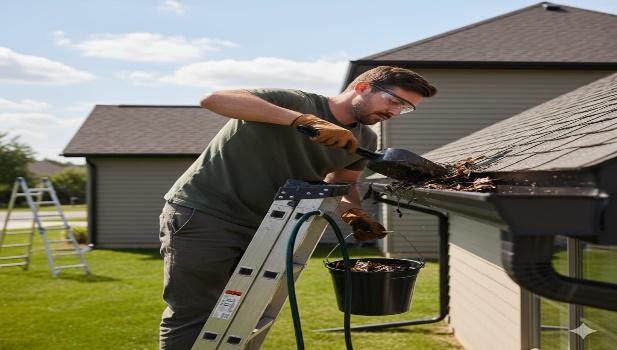
Put on gloves, grab a scoop, and clear out the leaves and gunk. Then flush the downspouts with a hose to make sure everything flows.
Step 8: Re-Caulk the Bathroom
That black stuff creeping along your tub? That’s mold—and it loves old, cracked caulk. Time to evict it. 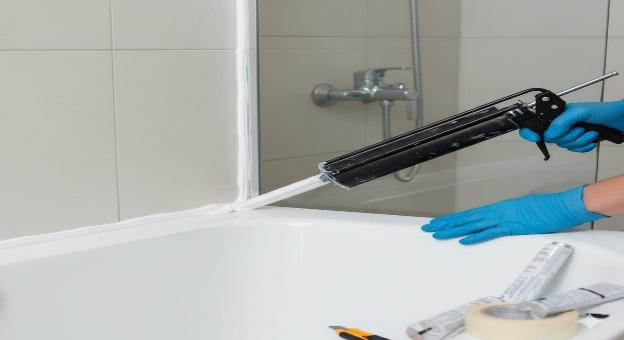
Use a utility knife to remove the old line, clean the surface, and apply a fresh bead of waterproof caulk. Smooth it out with a wet finger or a caulk tool.
For a beginner-friendly walkthrough
Step 9: Silence a Squeaky Door 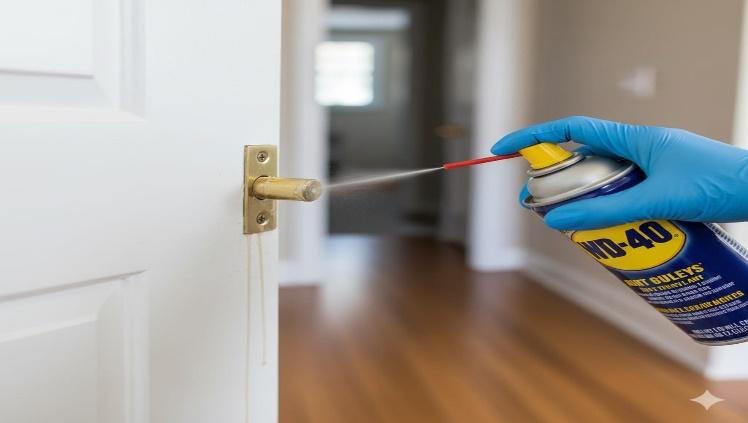
Every time you open that door, it squeals like it’s haunted. Luckily, the fix is ridiculously easy.
Spray a little WD-40 or silicone lubricant on the hinge, swing the door a few times, and wipe off the excess. Done.
Step 10: Test and Replace Smoke Detector Batteries

This one’s not about comfort—it’s about safety.
Smoke detectors save lives, but only if they’re working.
Press the test button once a month. Replace the batteries at least once a year—or immediately if it starts chirping.
What You’ll Be Glad You Learned
You don’t need to be a contractor to take care of your home—just someone who’s willing to learn. These fixes aren’t just about saving money (though they do that too). They’re about feeling capable, confident, and in control of your space.
Start with one fix. Then another. Before you know it, you’ll be the go-to problem solver in your household.