Want to grow your own herbs or veggies? Learn how to build a raised garden bed from scratch—with practical tips, tools, and real-life advice for beginners.
The DIY Project That Finally Got Me Growing
I’d been talking about starting a garden for months. But between the rocky soil, the weeds, and the neighborhood cats, nothing ever stuck. Then one weekend, I decided to stop overthinking and just build a raised garden bed.
It wasn’t perfect. I didn’t have a blueprint. But I ended up with a sturdy, functional bed that gave me fresh basil, cherry tomatoes, and a reason to step outside every morning.
Here’s exactly how I built it—what worked, what didn’t, and what I’d recommend if you’re starting from scratch.
Step 1: Choose the Right Spot
I walked around my yard with a cup of coffee, watching where the sun hit. The spot I picked gets about 6–8 hours of sunlight, is close to the hose, and doesn’t flood when it rains. 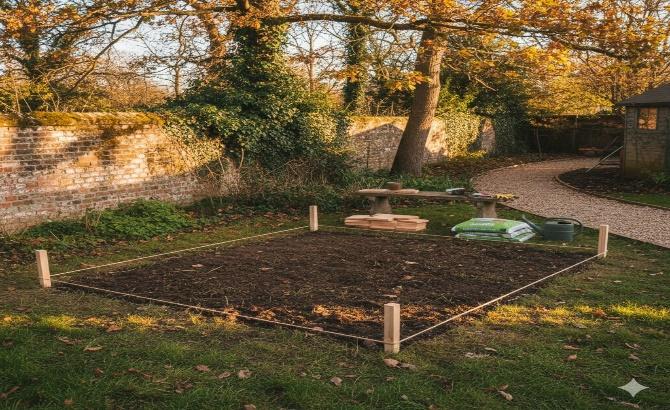
Things to consider:
- Sunlight: Most veggies need full sun
- Drainage: Avoid low spots that stay soggy
- Access: You’ll want to reach it easily for watering and harvesting
- Flatness: Saves you time leveling later when Creating a Vertical Garden Wall
Step 2: Decide on Size and Shape
I didn’t want anything too big. Just enough space for herbs, a few greens, and maybe some tomatoes. 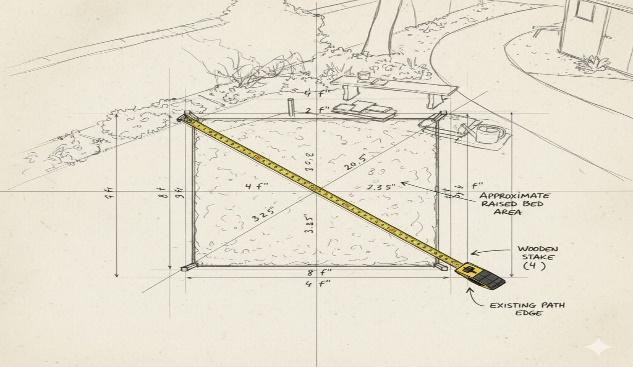
I went with a 1.2 m x 2.4 m rectangle—easy to reach from all sides without stepping inside. If you’re tight on space, even a 1 m x 1 m square can work wonders.
Tip: Keep the width under 1.2m so you can reach the center without climbing in.
Step 3: Gather Your Materials
I didn’t use fancy cedar or pre-cut kits. Just basic treated lumber from the hardware store and a few tools I already had.
Here’s what I used: 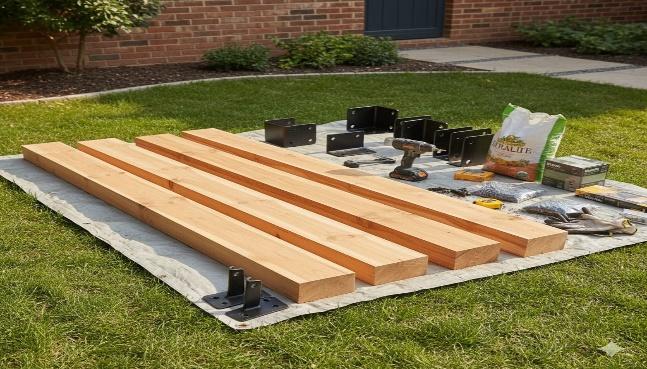
- Four 2×12 boards (two 2.4m, two 1.2m)
- Corner brackets and screws
- Drill and level
- Landscape fabric
- Soil mix: compost, topsoil, and a bit of sand
Optional but helpful:
- Rebar or stakes for reinforcement
- Wood sealant if you want extra protection Essential DIY Fixes Every Homeowner Should Know
Step 4: Build the Frame
I laid the boards out on the ground and screwed them together using corner brackets. Used a level to make sure everything was straight, then adjusted the ground underneath with a shovel. 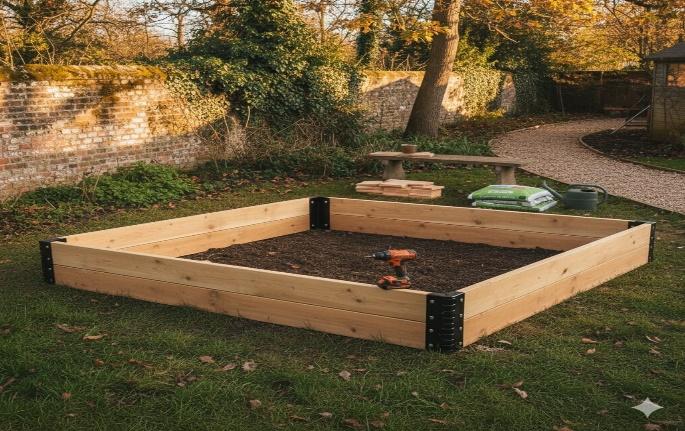
It took about 30 minutes to assemble. I didn’t overthink it—just made sure it was sturdy and square.
If you’re building on concrete or a patio, you can skip the digging and just place the frame directly.
Step 5: Line the Bottom (Optional but Smart) 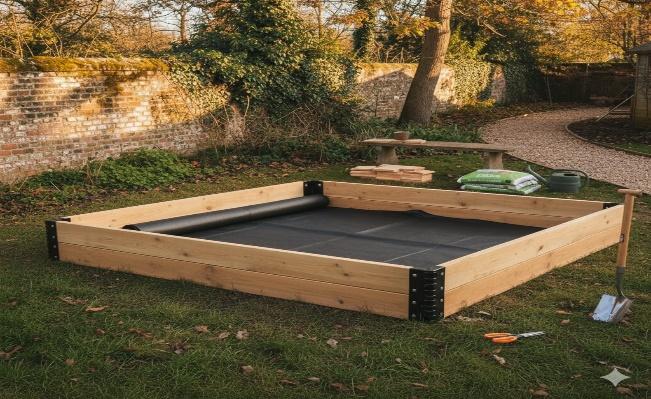
I laid down landscape fabric to block weeds and keep the soil from washing away. Some people skip this, but my yard has aggressive grass that creeps into everything.
You can also use cardboard or old burlap sacks. Just make sure water can still drain through.
Step 6: Fill It with the Right Soil 
I mixed compost, topsoil, and a bit of sand in a wheelbarrow. Then shoveled it into the bed until it was about 5 cm from the top.
Don’t just use garden soil—it’s too dense and doesn’t drain well. Raised beds need a loose, nutrient-rich mix that holds moisture but doesn’t stay soggy How to Measure for Kitchen Flooring
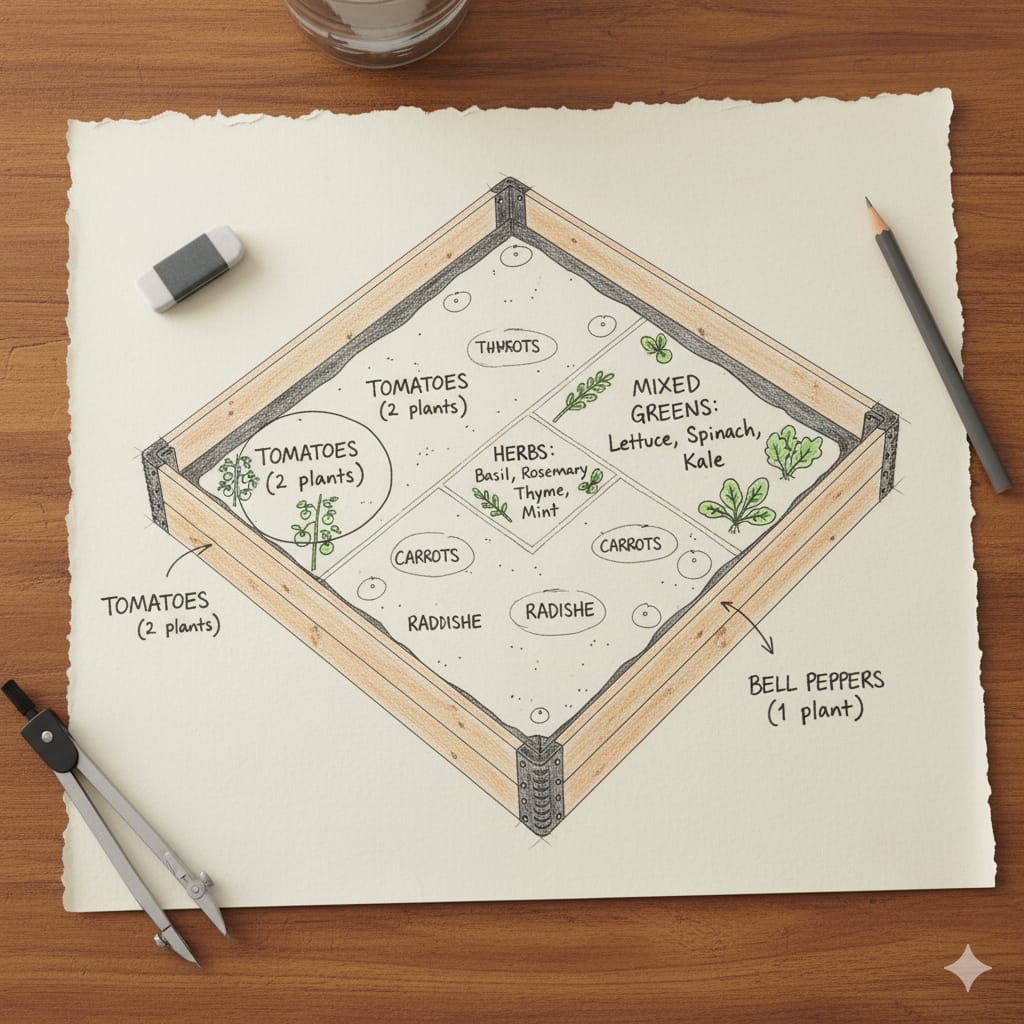
Step 7: Plan Your Planting Layout 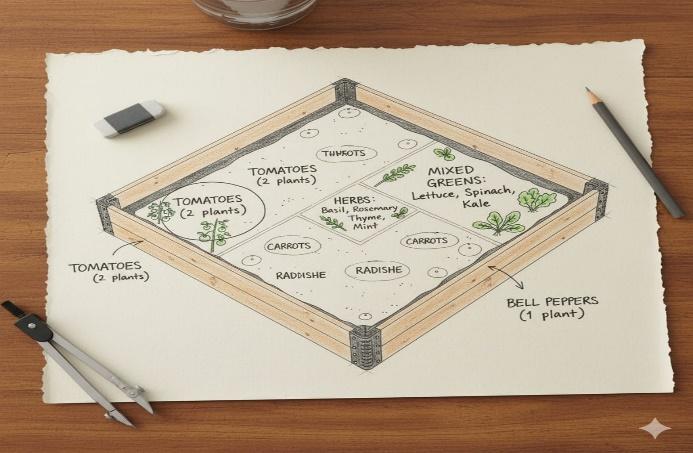
I didn’t want chaos. So I sketched a quick layout on paper: herbs on one side, greens in the middle, and tomatoes in the back.
I spaced everything based on the seed packets and left room for growth. Also added a few marigolds to help deter pests—they actually worked.
Step 8: Start Planting 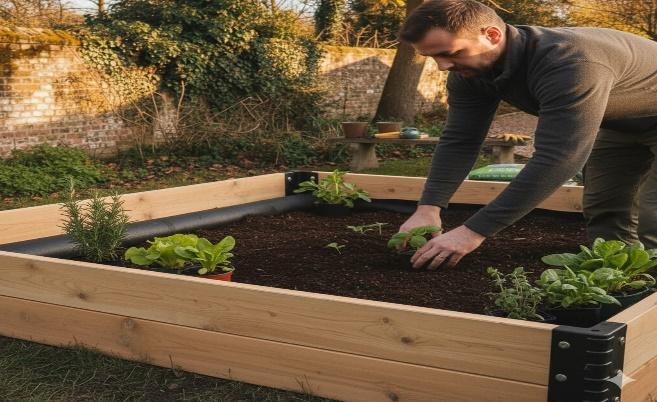
I planted basil, mint, lettuce, spinach, cherry tomatoes, and a few flowers. Used my hands, a small trowel, and a lot of trial and error.
I didn’t worry about perfection. Just made sure each plant had enough space, water, and sunlight.
Within a week, I saw sprouts. Within a month, I was harvesting.
Step 9: Water, Watch, and Adjust 
I watered every morning—just enough to moisten the soil. If it rained, I skipped a day. If the leaves drooped, I gave them a little extra.
I added mulch after two weeks to help retain moisture. Also moved a few plants around when they started crowding each other.
Gardening isn’t static. You learn as you go, and the bed evolves with the season.
Step 10: What I’d Do Differently Next Time
I’d build two beds instead of one. Once I saw how well it worked, I wanted more space—for carrots, peppers, maybe even strawberries. 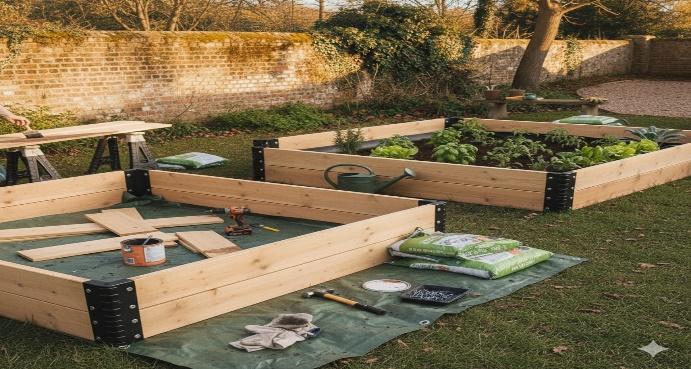
I’d also stain the wood before assembling. It faded faster than I expected, and sealing it afterward was awkward.
And I’d install drip irrigation from the start. Watering by hand is peaceful but not always practical.
Final Thoughts
Building a raised garden bed was the turning point. It took me from “I should start gardening” to “I’m growing my own food.”
It wasn’t expensive. It didn’t require special skills. And it gave me something real—fresh herbs, quiet mornings, and a sense of progress.
If you’ve been thinking about it, stop waiting. Pick a spot, grab some wood, and start building. Your garden doesn’t have to be perfect—it just has to begin.