
Learn how to replace a toilet on your own with this beginner-friendly guide. From removal to installation, sealing, and cleanup—everything you need to do it right.
I used to think replacing a toilet was one of those jobs you just leave to the pros. Pipes, water lines, heavy porcelain—it sounded like a recipe for disaster. But when my old toilet started leaking and wobbling, I decided to give it a shot myself.
Surprisingly? It wasn’t that hard. No leaks, no panic, and the whole thing cost me less than $200. If your toilet is outdated, cracked, or just plain ugly, you can absolutely swap it out on your own—and I’ll walk you through it, step by step.
Step 1: Choose the Right Toilet
Before I even thought about removing the old toilet, I grabbed a tape measure and checked the rough-in—that’s the distance from the wall to the center of the drainpipe. Most bathrooms have a standard 12-inch rough-in, but it’s always worth double-checking. A wrong measurement can turn into a return trip to the store real fast. 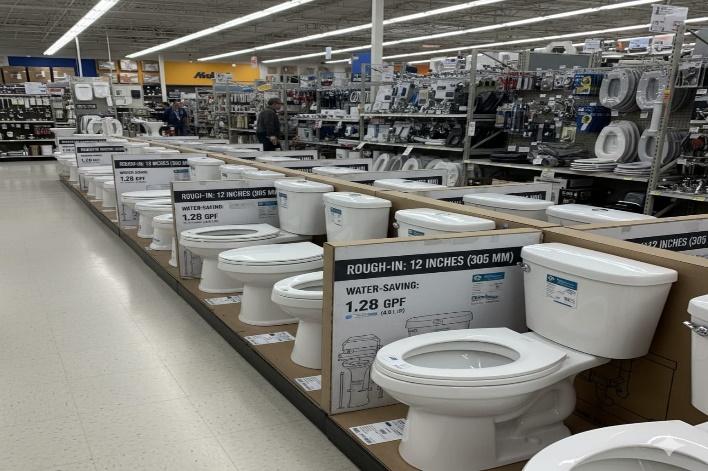
Once I had the size confirmed, I picked a two-piece toilet with a water-saving flush and a seat height that actually felt comfortable—not too low, not too high.
A few things that helped me choose:
- I looked for models with the WaterSense label—they use less water without sacrificing performance
- I went with an elongated bowl for extra comfort
- I made sure the box included a wax ring and mounting bolts (some don’t!)
And I grabbed a new supply line, just in case—better to have it than run back mid-install How to Choose the Right Drill for Home Projects
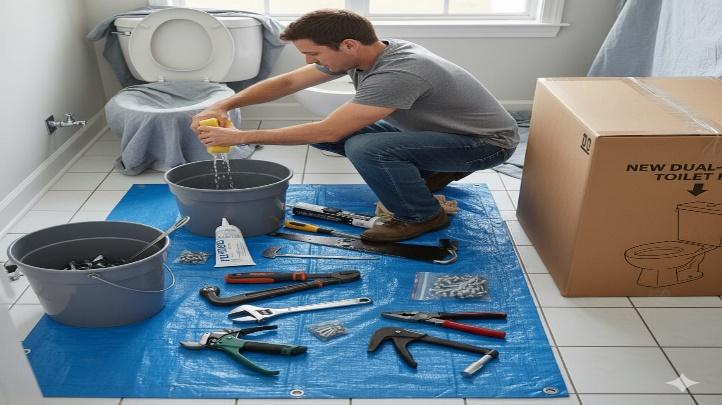
Step 2: Gather Your Tools and Materials
Before I even touched the old toilet, I made sure I had everything I’d need within arm’s reach. Trust me—nothing slows you down like realizing you’re missing a tool halfway through and standing there with a disconnected toilet. 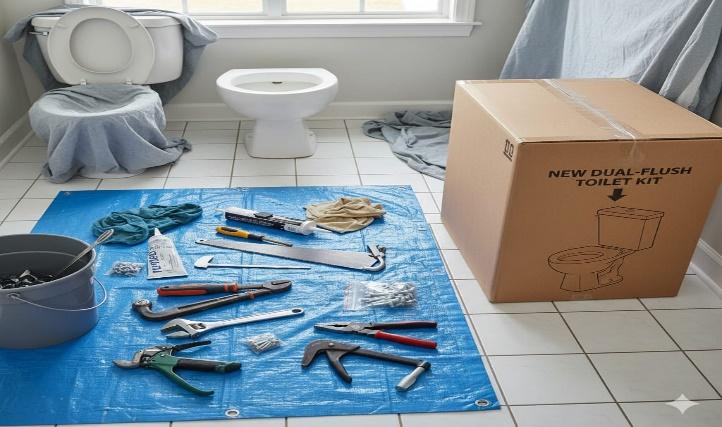
Here’s what I laid out on the floor before starting:
- Adjustable wrench—for loosening bolts and water connections
- Bucket and towels—because yes, there will be water
- Putty knife—to scrape off the old wax ring
- Utility knife—for trimming and cleanup
- Wax ring—the key to a leak-free seal
- Closet bolts—to secure the toilet to the floor
- Screwdriver—for tank and seat screws
- Level—to make sure the toilet sits evenly
- Plumber’s tape—for sealing threaded connections
- Safety gear—gloves and goggles, because hygiene matters
I didn’t use anything fancy—just basic tools you probably already have or can grab from any hardware store. Essential Materials for Home Renovation Projects
Step 3: Turn Off Water and Drain the Old Toilet
The first thing I did was shut off the water supply valve—it’s usually right behind the toilet near the floor. Then I flushed to empty the tank as much as possible. But even after that, there’s always a bit of water left sitting in the bowl and tank.
So I grabbed a sponge and a couple of old towels and soaked up every last drop. It’s not glamorous, but it saves you from unexpected puddles later.
Here’s the exact order I followed:
- Removed the tank lid and gave it a full flush
- Used a sponge to soak up leftover water from the tank and bowl
- Placed a bucket underneath the toilet to catch any drips when disconnecting How to Fix a Leaky Faucet DIY
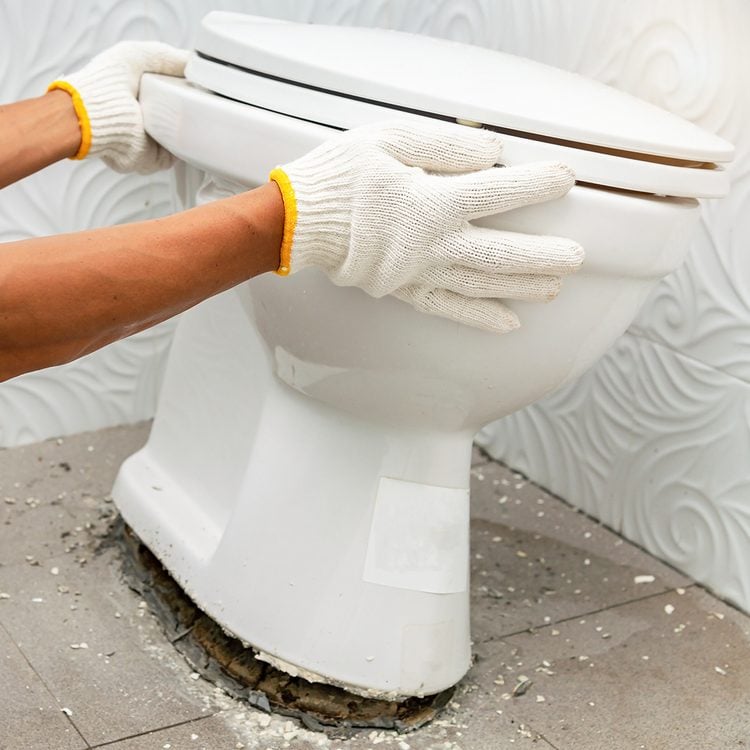
Step 4: Remove the Old Toilet
Once everything was drained and dry, I got to the part I was dreading—lifting the toilet. First, I loosened the nuts on the closet bolts at the base. Then I gently rocked the toilet back and forth to break the seal. It took a bit of effort, but once it loosened, I carefully lifted it and placed it on an old towel to avoid scratching the floor. 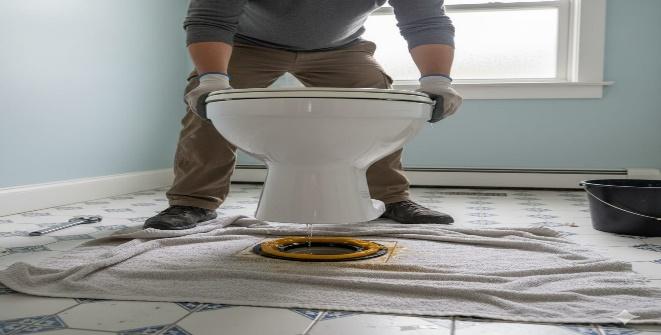
Next came the messy part: scraping off the old wax ring. It’s sticky, smelly, and not exactly fun—but it’s got to go. After that, I stuffed a rag into the drain opening to block sewer gases from coming up while I worked.
Pro tip: Wear gloves and open a window. It’s not the prettiest job, but keeping things clean and ventilated makes a big difference.
Step 5: Install New Closet Bolts and Wax Ring
With the old toilet out of the way, I gave the flange a good clean—scraped off any leftover wax and wiped it down so the new seal would sit properly. Then I dropped in a fresh set of closet bolts, making sure they were aligned straight and snug in the slots. 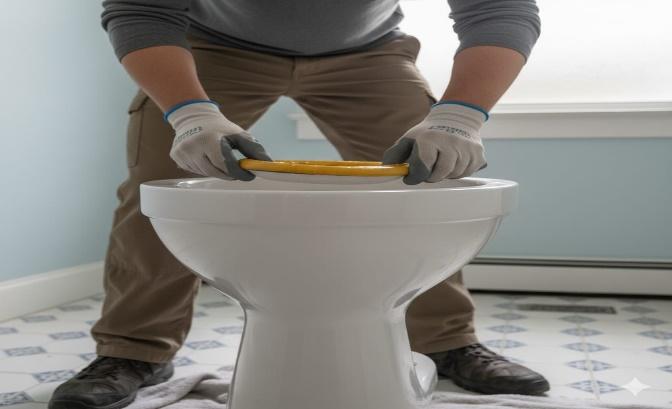
Instead of placing the wax ring on the flange (which can shift), I pressed it firmly onto the bottom of the toilet bowl. That way, it stayed in place when I lowered the toilet—no sliding, no guessing.
This little trick made the next step way easier.
How to Install Outdoor Lighting for Ambience
Step 6: Set the New Toilet in Place
This part needed a bit of focus—toilets aren’t light, and you only get one shot to line it up right. I carefully lowered the toilet bowl straight down onto the closet bolts, making sure it was centered over the flange. Once it was in position, I pressed down firmly to compress the wax ring and create a solid seal. 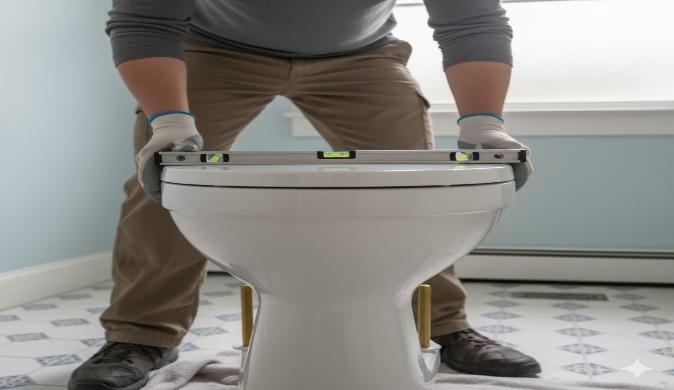
Then I secured the nuts onto the bolts, tightening them just enough to hold the toilet in place—not too tight though, because porcelain can crack if you go overboard.
A few tips that helped:
- I used a level to make sure the toilet wasn’t leaning to one side
- Sat on it briefly (yes, really) to help compress the wax ring evenly
- And double-checked the bolts before moving on—snug, but not stressed
Step 7: Reconnect Water Supply and Test
Once the toilet was securely in place, I reattached the water supply line to the fill valve and turned the shut-off valve back on. The tank started filling right away, and I kept an eye on everything—especially around the base and the connection point—to make sure there were no sneaky leaks. 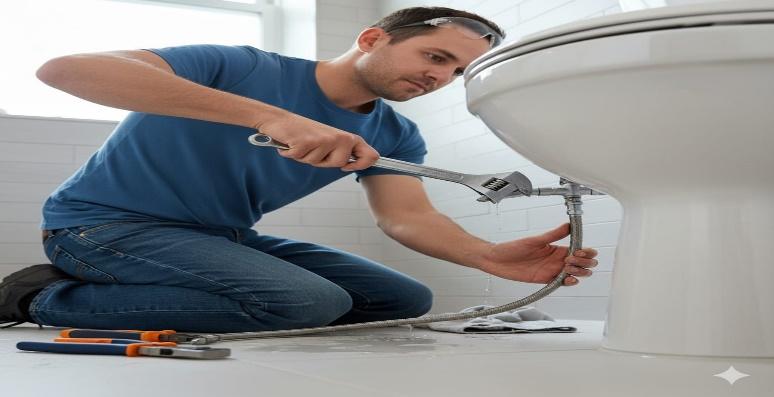
I flushed a few times to test the setup. The flush was strong, quiet, and clean—no drips, no puddles, no surprises.
Here’s what I checked during testing:
- Tightened the supply line with a wrench, but not too hard
- Looked carefully for any drips or water pooling around the base
- Made sure the flush was smooth and powerful
- Adjusted the fill valve slightly to get the water level just right
This final check gave me peace of mind—everything was working exactly as it should.
Step 8: Seal and Finish 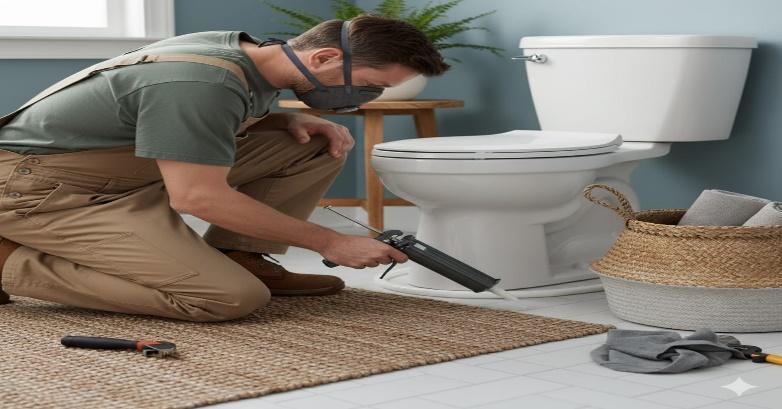
To wrap things up, I ran a clean bead of caulk around the base of the toilet. I left a small gap at the back—just in case a leak ever shows up, it’ll have somewhere to escape instead of getting trapped underneath.
Once the seal was done, I gave the area a quick clean, popped the tank lid back on, and added a few finishing touches—a soft rug and a small basket for essentials—and suddenly the space felt fresh again
From Flush to Finish—You Did It
Replacing a toilet might sound intimidating, but once you break it down, it’s just a series of simple steps. You saved money, learned something new, and gave your bathroom a fresh start. So next time someone says, “You did that yourself?”—you can smile and say, “Yep. And it works perfectly.”