
Learn how to paint and seal outdoor wood the right way—with step-by-step tips, tools, and real-life advice to protect your deck, fence, or furniture from the elements.
How I Protected My Backyard Projects from Sun, Rain, and Time
I built a raised garden bed, a small bench, and a privacy fence—all from untreated wood. They looked great at first. But after a few months, the sun started bleaching the boards, and the rain left dark stains. That’s when I realized: if I wanted these projects to last, I had to seal and paint them properly.
This guide isn’t just theory—it’s what I actually did. From sanding to sealing, here’s how I protected my outdoor wood and gave it a finish that holds up.
Step 1: Choose the Right Time and Weather
The first time I sealed outdoor wood, I thought a sunny afternoon was good enough. It wasn’t. By the next morning, unexpected rain had ruined the finish—bubbling, peeling, and wasting hours of work. 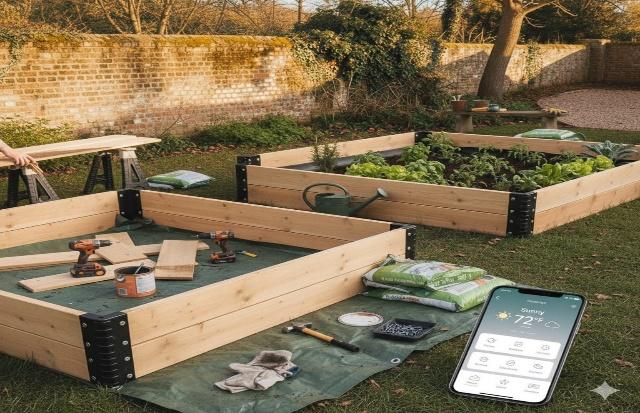
Since then, I’ve learned to wait for the right conditions. I check the forecast carefully and only start when I’m sure I’ll get:
- At least 48 hours of dry weather
- Mild temperatures between 15°C and 30°C
- Low humidity to help everything cure properly
I also avoid painting in direct midday sun. Early mornings or late afternoons are ideal—cooler, calmer, and less likely to cause streaks or fast drying that leads to cracking How to Measure for Kitchen Flooring
Step 2: Clean the Surface Thoroughly
Before I even thought about paint or sealant, I gave the wood a proper clean. It had picked up everything—dust, pollen, bits of soil, even a few bird droppings. If I’d painted over that, it would’ve peeled in no time. 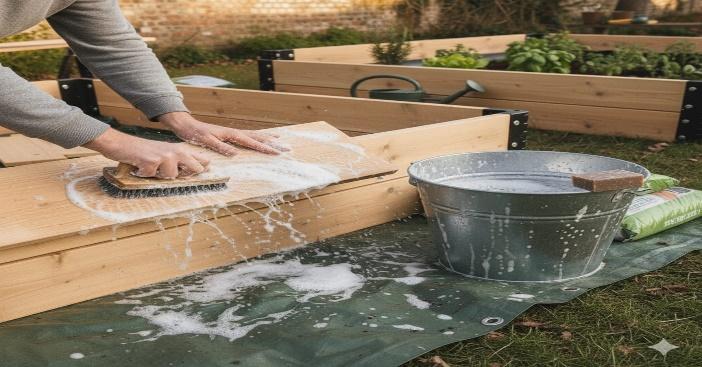
I grabbed a stiff brush and mixed up a bucket of warm water with a splash of mild dish soap. For the older boards that had started to discolor, I added a little vinegar—nothing fancy, just enough to lift the stains.
After scrubbing every surface, I rinsed it down and let it dry completely. Not just a few hours—I gave it a full day in the sun to make sure no moisture was trapped inside
Step 3: Sand for a Smooth Finish 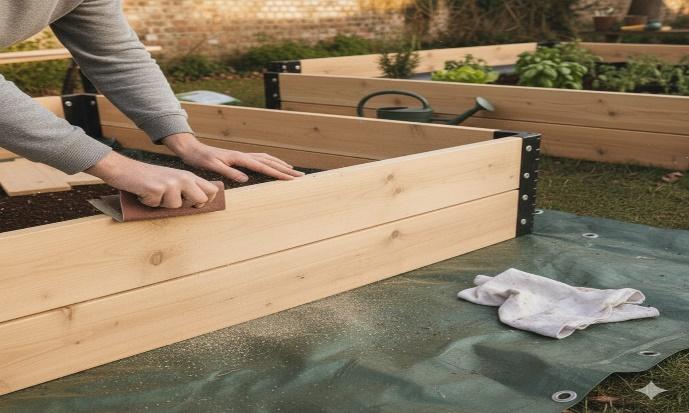
Sanding made a huge difference. It helped the paint stick better and gave the wood a clean, even texture.
I used medium-grit sandpaper (around 120) for general smoothing, then fine-grit (220) for edges and corners. Wiped everything down with a damp cloth afterward to remove dust. Building a Simple Wooden Deck Yourself
Step 4: Apply Primer (Don’t Skip This)
I used a water-based exterior wood primer. It sealed the pores and gave the paint something to grip. 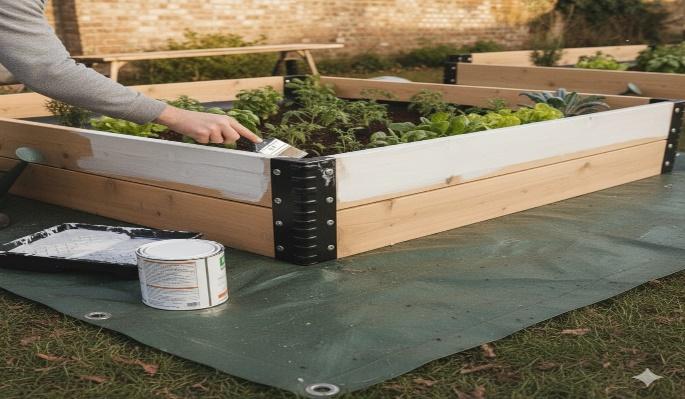
I applied it with a brush for corners and a roller for flat surfaces. Let it dry for 4–6 hours before painting.
If you’re staining instead of painting, you can skip primer—but sealing still matters.
Step 5: Choose the Right Paint or Stain
I went with exterior acrylic latex paint—it’s flexible, weather-resistant, and easy to clean. For the bench, I used a semi-transparent stain to keep the wood grain visible. 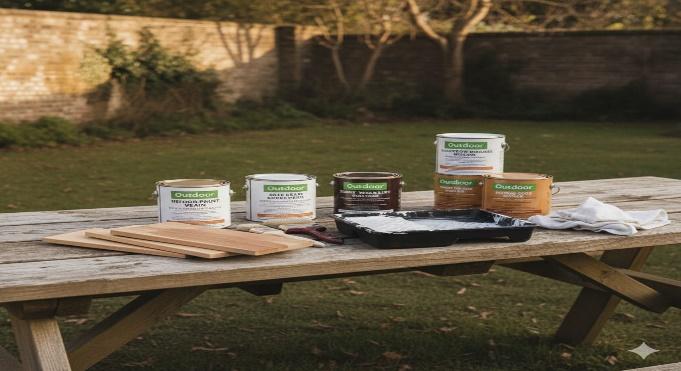
Things to consider:
- Paint gives full coverage and color
- Stain shows texture and feels more natural
- Oil-based lasts longer but takes longer to dry
- Water-based is easier to clean and eco-friendly. Budget-Friendly Patio Furniture Ideas
Step 6: Paint or Stain with Care
I started with the edges and corners using a brush, then switched to a roller for the flat areas. Two thin coats worked better than one thick one—less dripping, better coverage. 
I let the first coat dry overnight, then added the second the next morning. For stain, I wiped off the excess after 15 minutes to avoid blotches.
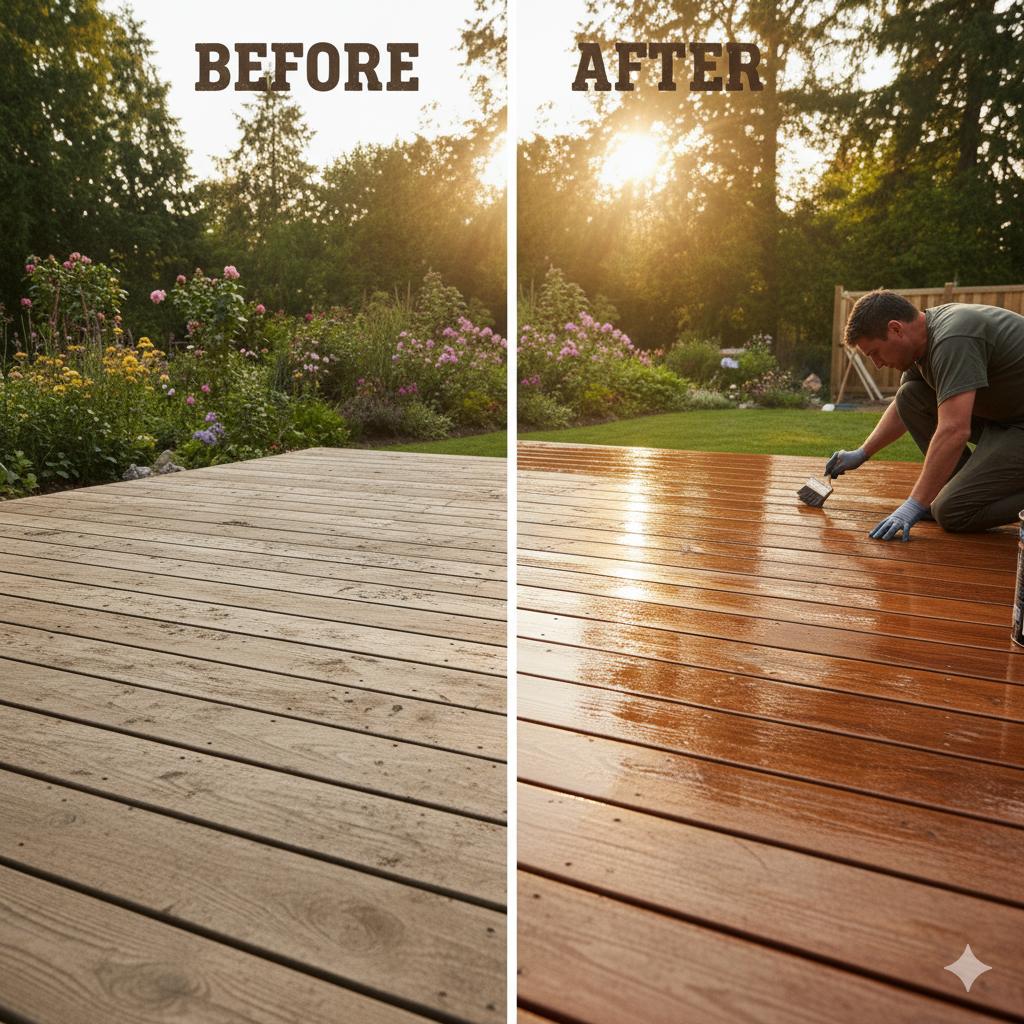
Step 7: Seal It for Long-Term Protection
This is the step that really matters. I used a clear water-based polyurethane sealer for the painted surfaces and a penetrating wood sealer for the stained bench.
Applied with a clean brush, let it dry for 24 hours, then added a second coat. It gave everything a slight sheen and helped repel water and UV damage.
Step 8: Let It Cure Before Use 
I was tempted to sit on the bench right away—but I waited. Paint and sealers need time to cure, not just dry.
I gave everything 3 full days before watering near it, placing pots, or sitting down. It was worth it—no smudges, no tackiness, just a clean finish.
Step 9: Maintain It Seasonally 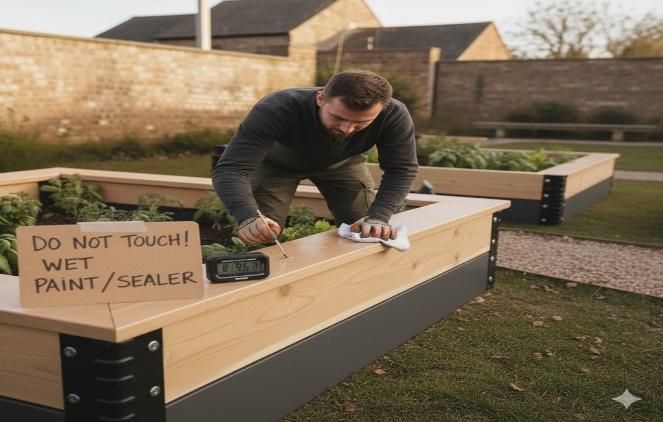
Even sealed wood needs care. Every few months, I check for peeling, fading, or water spots.
I clean the surface gently, touch up paint if needed, and reapply sealer once a year. It takes an afternoon, but it saves me from rebuilding things later.
Step 10: What I’d Do Differently Next Time
I’d test the paint on a scrap piece first. The color looked different in sunlight than it did in the store. 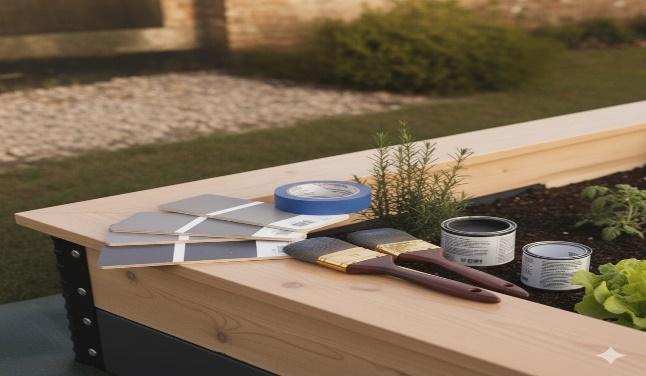
I’d also use painter’s tape around the edges—I got a few drips on the garden bed that were hard to clean.
And I’d buy better brushes. Cheap ones shed bristles and left streaks.
Final Thoughts
Painting and sealing outdoor wood isn’t just about looks—it’s about longevity. It protects your work from sun, rain, and wear and makes everything feel finished.
I didn’t get it perfect the first time. But now, my fence looks fresh, my bench feels smooth, and my garden bed still holds up after two summers.
If you’ve built something outdoors, don’t wait. A few hours of prep and paint can save you months of repairs—and make your space feel brand new.